Vệ sinh sofa da thật tại nhà thế nào để không bong tróc, nổ da?
Muốn làm sạch mà không hại da, cốt lõi là “ít nước, lau mỏng, dưỡng đúng lúc”. Quy trình an toàn thường gồm: kiểm tra loại da ở góc khuất, hút bụi và lau khô trước, lau ẩm rất nhẹ theo từng mảng nhỏ, rồi lau khô ngay và dưỡng bề mặt khi đã khô hẳn. Cách này hợp cho vệ sinh định kỳ và xử lý vết bẩn mới, miễn tránh hóa chất mạnh và nhiệt cao.
- Test góc khuất trước
- Hút bụi kỹ khe chỉ
- Lau ẩm cực nhẹ
- Dưỡng sau khi khô

Sofa da thật dễ “xuống sắc” không phải vì bẩn, mà vì bị lau sai: ướt tay, cọ mạnh, dùng chất tẩy, hoặc sấy nóng cho nhanh khô. Hướng dẫn vệ sinh sofa da thật: Tránh bong tróc và nổ da tập trung vào cách làm sạch an toàn theo từng tình huống thường gặp, giúp bề mặt giữ độ mềm, màu ổn định và hạn chế rạn nứt ở vùng ngồi nhiều. Phương Gia Foundation ưu tiên nguyên tắc thực tế: kiểm tra trước, làm từng lớp mỏng, và dừng đúng lúc khi thấy dấu hiệu rủi ro.
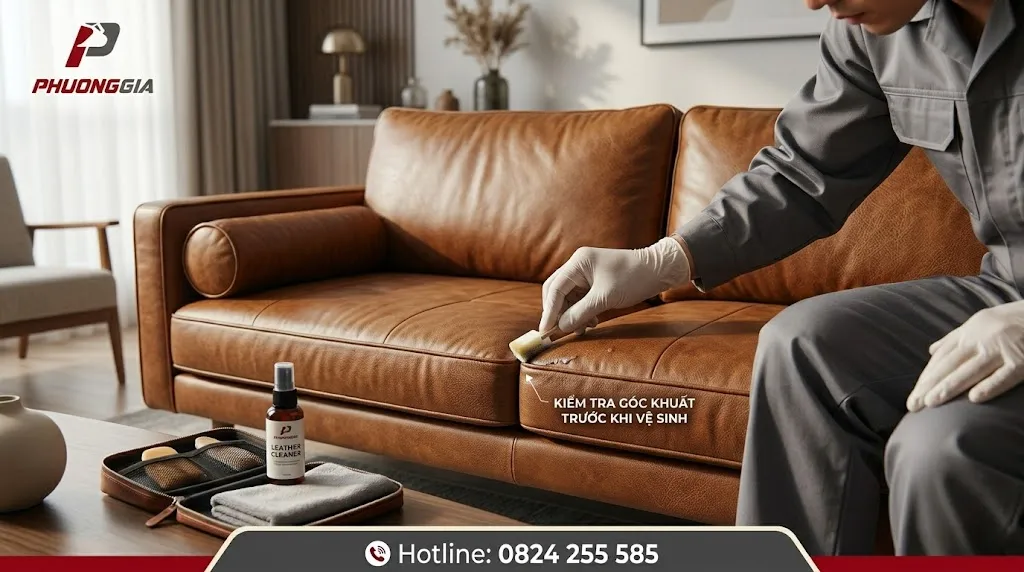
Nhận diện loại da và test góc khuất trước khi lau
Muốn tránh loang màu và bong lớp bề mặt, hãy xác định da thuộc nhóm “thấm” hay “phủ bảo vệ” trước khi dùng bất kỳ dung dịch nào. Nếu da thấm nhanh hoặc ra màu khi chấm thử, bạn cần thao tác nhẹ hơn và giảm độ ẩm tối đa. Chỉ vài phút kiểm tra sẽ giúp bạn chọn đúng cách lau và tránh phải “chữa cháy” về sau.
Ba nhóm thường gặp gồm: da aniline (aniline) ít lớp phủ, thấm mạnh; da bán aniline (semi-aniline) có lớp bảo vệ mỏng; da phủ màu (pigmented) có lớp phủ rõ và dễ vệ sinh hơn. Dấu hiệu cần cẩn trọng: bề mặt xỉn như phủ phấn, rạn li ti ở mép ngồi, hoặc sờ thấy khô ráp ở tay vịn và tựa đầu.
Test 60 giây để biết có nên lau ẩm
Test đúng giúp bạn biết “lau ẩm rất nhẹ” hay chỉ nên làm sạch khô. Dùng tăm bông thấm nước sạch rồi vắt gần khô, chấm nhẹ ở góc khuất: nếu thấm loang nhanh, đổi độ bóng rõ, hoặc dính màu ra bông, hãy chuyển sang phương án ít ẩm và lặp nhiều lượt mỏng.
- Chọn góc khuất dưới nệm
- Chấm nhẹ 1 lần, không chà
- Đợi 60–90 giây quan sát
- Bất thường thì dừng ngay
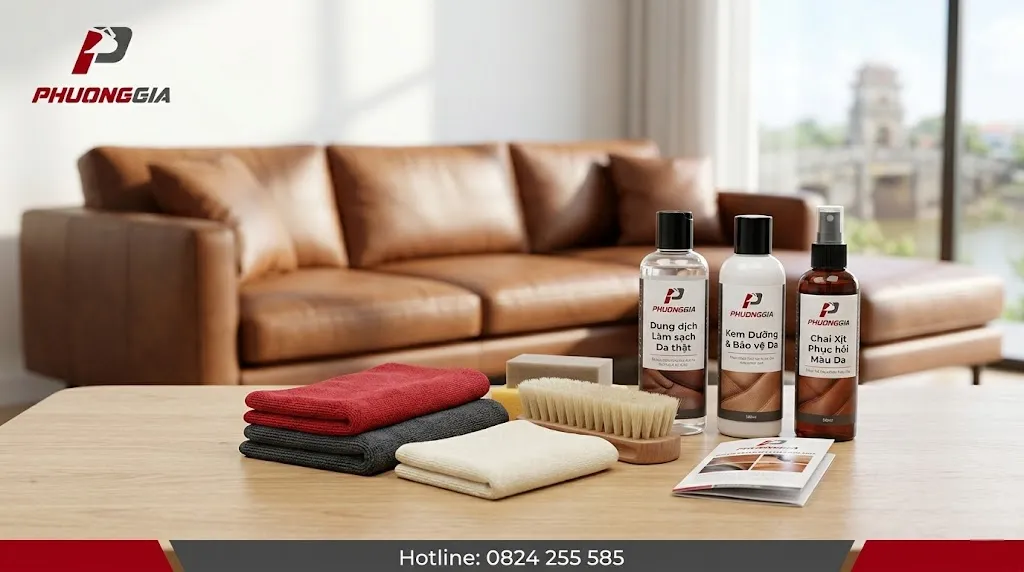
Chuẩn bị dụng cụ và dung dịch “hiền” với da thật
Để sạch mà không cần dùng lực, bạn cần đúng khăn và đúng dung dịch, không cần đồ đắt tiền. Khi dụng cụ đủ mềm và lượng nước được kiểm soát, bề mặt sẽ ít xước mờ và ít khô căng sau vệ sinh. Hãy chuẩn bị theo hướng “đủ dùng, dễ kiểm soát”.
Bộ tối thiểu gồm: máy hút bụi đầu chổi mềm, 2 khăn microfiber sạch (một khăn lau ẩm, một khăn lau khô), bình xịt phun sương, bát nước ấm, và dung dịch pH trung tính. Nếu bạn muốn đối chiếu phạm vi công việc theo từng hạng mục bề mặt trong nhà, phần mô tả ở quy trình làm sạch sofa, rèm, đệm giúp hình dung rõ các bước và các điểm dễ sai khi tự làm.
Danh sách “không dùng” để tránh bong tróc
Da thật không hợp các chất tẩy mạnh và dung môi bay hơi nhanh. Chỉ cần tránh đúng các món dưới đây, rủi ro nổ da đã giảm rất nhiều.
- Không dùng Javel, amoniac, nước lau kính
- Không dùng acetone, xăng thơm, dung môi mạnh
- Hạn chế cồn nồng độ cao, khăn ướt hương liệu đậm
- Không dùng bàn chải cứng, miếng chà nhám
Quy trình vệ sinh sofa da thật 4 bước, làm sạch mà không “mỏng da”
Quy trình an toàn nhất là làm sạch theo lớp mỏng và lau khô ngay theo từng mảng nhỏ. Khi bạn chia sofa thành từng vùng và kiểm soát độ ẩm, bề mặt sẽ sạch đều mà không loang. Mục tiêu là sạch vừa đủ, không phải “sạch căng bóng”.
Tóm tắt 30 giây: hút bụi kỹ, lau khô gom bụi mịn, lau ẩm rất nhẹ (xịt lên khăn), lau khô ngay rồi để thoáng. Bạn sẽ thấy bề mặt ổn định hơn sau 1–2 chu kỳ thay vì cố chà mạnh trong một lần.
| Nên làm | Không nên làm |
|---|---|
| Lau theo mảng nhỏ, lặp nhiều lượt mỏng | Đổ nước trực tiếp lên bề mặt |
| Xịt dung dịch lên khăn, vắt gần khô | Cọ mạnh để “bóc” vết bẩn |
| Lau khô ngay sau mỗi mảng | Sấy nóng hoặc phơi nắng trực tiếp |
| Thử góc khuất trước mọi xử lý | Dùng chất tẩy đa năng cho tiện |
Bước 1: Hút bụi và làm sạch khô
Hút bụi là bước chống xước mờ hiệu quả nhất, vì cát mịn ở khe chỉ sẽ “cào” bề mặt khi bạn lau. Dùng đầu chổi mềm đi theo đường may, nếp gấp, rồi lau sơ bằng khăn khô để gom bụi còn lại.
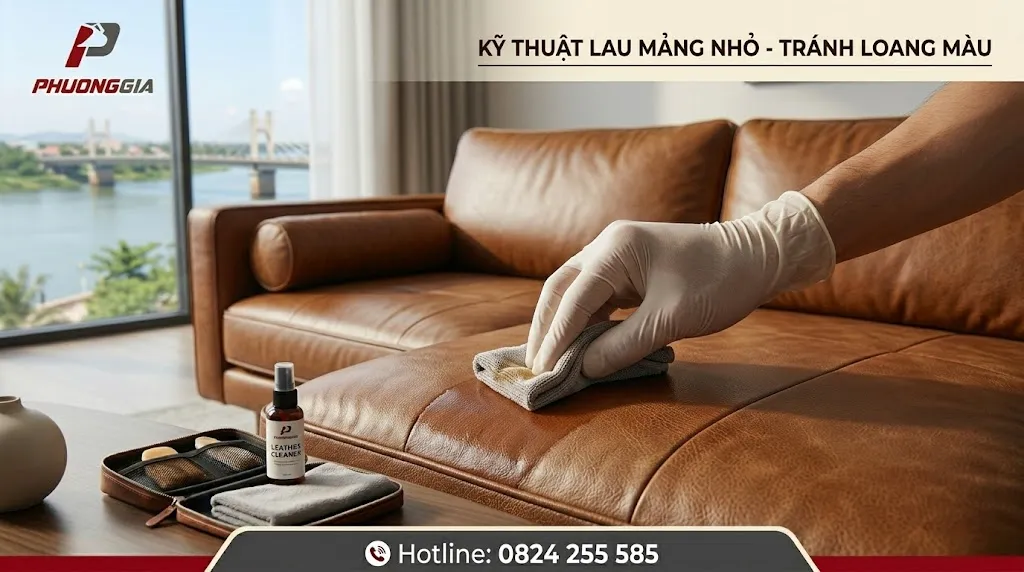
Bước 2: Lau ẩm rất nhẹ bằng dung dịch pH trung tính
Xịt lên khăn, không xịt trực tiếp lên sofa. Lau theo vòng tròn nhỏ 2–3 lượt mỏng, sau đó lau theo một chiều để đều vân và đều độ bóng; nếu vết bẩn còn, hãy tăng số lượt chứ đừng tăng nước.
Bước 3: Lau khô ngay và để thoáng gió
Dùng khăn khô sạch lau lại ngay sau mỗi mảng để kéo ẩm ra khỏi bề mặt. Để ghế nơi thoáng gió tự nhiên, tránh quạt nóng và tránh đặt sát cửa nắng gắt vì nhiệt làm da co và dễ rạn.
Bước 4: Kiểm tra bề mặt trước khi kết thúc
Kiểm tra giúp bạn phát hiện sớm vệt loang, vùng còn ẩm, hoặc điểm bết dung dịch. Nếu thấy loang nhẹ, hãy lau mỏng toàn mảng bằng khăn gần khô để cân bằng, rồi để khô tự nhiên.
Xử lý vết bẩn khó: làm đúng thứ tự để không loang màu
Vết bẩn khó cần xử lý theo kiểu “thấm trước, lau sau”, tránh chà ngay từ đầu. Nếu bạn can thiệp sớm và đúng loại vết bẩn, khả năng sạch cao hơn mà rủi ro thấp hơn. Nguyên tắc an toàn là đi từ nhẹ đến mạnh và luôn thử góc khuất.
Gợi ý theo nhóm vết bẩn thường gặp
Mỗi nhóm vết bẩn có cách “mềm” riêng, mục tiêu là làm nhạt dần theo nhiều lượt mỏng.
- Dầu mỡ: thấm khăn khô, lau mỏng nhiều lượt
- Bám màu quần jeans: xử lý sớm, tránh cọ mạnh
- Mực bút: ưu tiên dung dịch chuyên dụng, test trước
- Nấm mốc: giảm ẩm phòng, lau khô, không làm ướt sâu
Ba lỗi hay gặp khi xử lý vết bẩn
Nếu bạn tránh được các lỗi dưới đây, khả năng “hỏng vì cứu sai” giảm đi rất rõ.
- Lau ướt quá khiến vết bẩn loang rộng
- Dùng chất tẩy mạnh làm bạc màu bề mặt
- Chà mạnh làm mờ vân và xước lớp phủ

Dưỡng và chống nổ da: môi trường, lịch chăm sóc, thói quen dùng ghế
Bong tróc và nổ da thường đến từ khô, nhiệt và ma sát lặp lại, không chỉ từ chuyện vệ sinh. Nếu bạn kiểm soát môi trường và dưỡng định kỳ, bề mặt sẽ mềm và ít rạn hơn, nhất là vùng ngồi nhiều. Đừng đợi da khô trắng mới dưỡng, lúc đó dễ “đứt gãy” hơn.
Sau khi sofa khô hẳn, thoa dưỡng lượng nhỏ và tán đều; không bôi dày để tránh bết và hút bụi. Tránh để điều hòa thổi trực tiếp vào ghế trong nhiều giờ, hạn chế đặt gần nguồn nhiệt, và nếu có thú cưng thì nên dùng tấm phủ mỏng ở vùng hay cào.
Lịch chăm sóc gợi ý (linh hoạt theo tần suất dùng)
Lịch này giúp da “đủ ẩm” mà không mất công, bạn có thể tăng giảm theo thời tiết và mức sử dụng.
- Lau bụi khô: 2–3 lần/tuần
- Lau ẩm rất nhẹ: 2–4 tuần/lần
- Dưỡng bề mặt: 6–10 tuần/lần
- Kiểm tra rạn, xỉn màu: mỗi tháng
Case ngắn: khi lau sạch quá tay
Nhiều sofa bị xỉn và “rát tay” sau vài ngày lau khăn ướt liên tục vì thấy bẩn nhanh trở lại. Khi chuyển sang hút bụi kỹ, lau mỏng theo mảng và dưỡng sau khi khô, bề mặt ổn định hơn, ít bám lại và cảm giác mềm dần trở lại sau vài lần chăm sóc.
Khi nào nên gọi dịch vụ để tránh làm hỏng thêm
Nên gọi dịch vụ khi test góc khuất ra màu rõ, bề mặt loang mạnh sau lau, hoặc có mốc lan và mùi ẩm kéo dài. Nếu vùng ngồi đã rạn li ti kèm bong lớp phủ, tự xử lý thường chỉ làm tình trạng tệ hơn vì khó kiểm soát độ ẩm và hóa chất. Chọn phương án chuyên sâu sẽ an toàn hơn cho lớp bề mặt đã yếu.
Khi bạn cần một quy trình bài bản từ hút bụi khe chỉ đến xử lý vết bẩn và dưỡng phục hồi, gói vệ sinh sofa tận nhà là nguồn tham chiếu hữu ích để so phạm vi công việc và tiêu chí an toàn trước khi quyết định tự làm hay thuê.
Câu hỏi thường gặp (FAQ)
Có nên dùng máy hơi nước để làm sạch sofa da thật không?
Không nên dùng trực tiếp vì nhiệt và ẩm có thể làm da co, loang màu hoặc bong lớp phủ. Nếu bắt buộc, chỉ dùng rất xa và kiểm soát cực chặt.
Dùng xà phòng rửa chén pha loãng để lau có an toàn không?
Chỉ dùng khi bất khả kháng, pha thật loãng và test góc khuất trước. Ưu tiên dung dịch pH trung tính để ổn định bề mặt hơn.
Lau xong xuất hiện vệt loang nhẹ thì xử lý thế nào?
Dừng chà, lau mỏng toàn mảng bằng khăn gần khô để cân bằng, rồi để khô tự nhiên. Nếu loang rõ hoặc đổi màu, nên nhờ chuyên môn.
Sofa bị bám màu quần jeans có hết hẳn được không?
Tùy loại da và thời gian bám, xử lý sớm thường cải thiện rõ. Tránh cọ mạnh vì dễ bạc màu và thô bề mặt.
Dưỡng da xong bao lâu thì ngồi lại được?
Khi bề mặt khô ráo và không còn trơn dính là dùng được. Nếu lỡ bôi dày, lau bớt để tránh bết và hút bụi.
Sofa đã “nổ da” rồi có vệ sinh được không?
Vẫn có thể làm sạch nhẹ để hạn chế bẩn bám thêm, nhưng phần hư hại thường cần phục hồi. Ưu tiên thao tác khô và cực ít ẩm.
Kết luận
Giữ sofa da thật bền đẹp không phụ thuộc vào lau nhiều, mà phụ thuộc vào cách lau: test góc khuất, kiểm soát nước, lau mỏng theo mảng, lau khô ngay và dưỡng khi đã khô hẳn. Với thói quen đúng, bề mặt sẽ mềm hơn, màu ổn định hơn và giảm nguy cơ rạn, bong tróc theo thời gian.